Azure Bot Registration
What You’ll Create
- Azure Bot resource for Teams integration
- Authentication credentials (App ID, Password, Tenant ID)
- Secure communication channel with Teams
Step-by-Step Setup
1. Access Azure Portal
Navigate to Azure Portal and sign in:
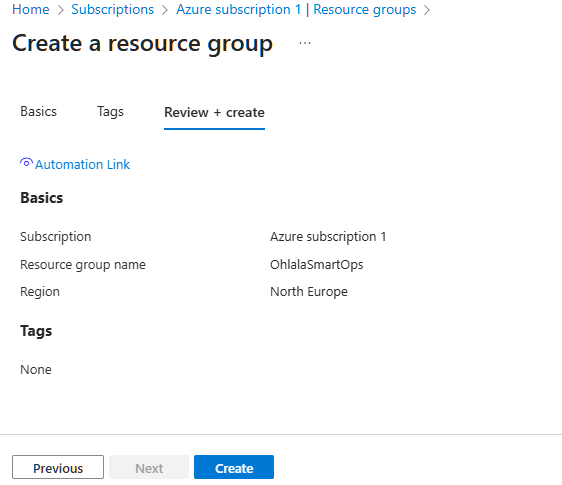
2. Create Resource Group (Optional)
It’s recommended to create a dedicated resource group:
- Search for “Resource groups” in the search bar
- Click “Create”
- Configure:
- Subscription: Your Azure subscription
- Resource group:
ohlala-smartops-rg - Region: Choose any region (e.g., North Europe)
- Click “Review + create” then “Create”
3. Create Azure Bot
Search for Azure Bot
In the Azure Portal search bar, type “Azure Bot” and select it from the marketplace.

Configure Bot Settings
Fill in the bot configuration:
Bot handle: OhlalaSmartOps
Subscription: Your Azure subscription
Resource group: ohlala-smartops-rg (or your chosen group)
Location: North Europe (or your preferred region)
Pricing tier: F0 (Free)
Type: Single Tenant (default)
Microsoft App ID: Create new
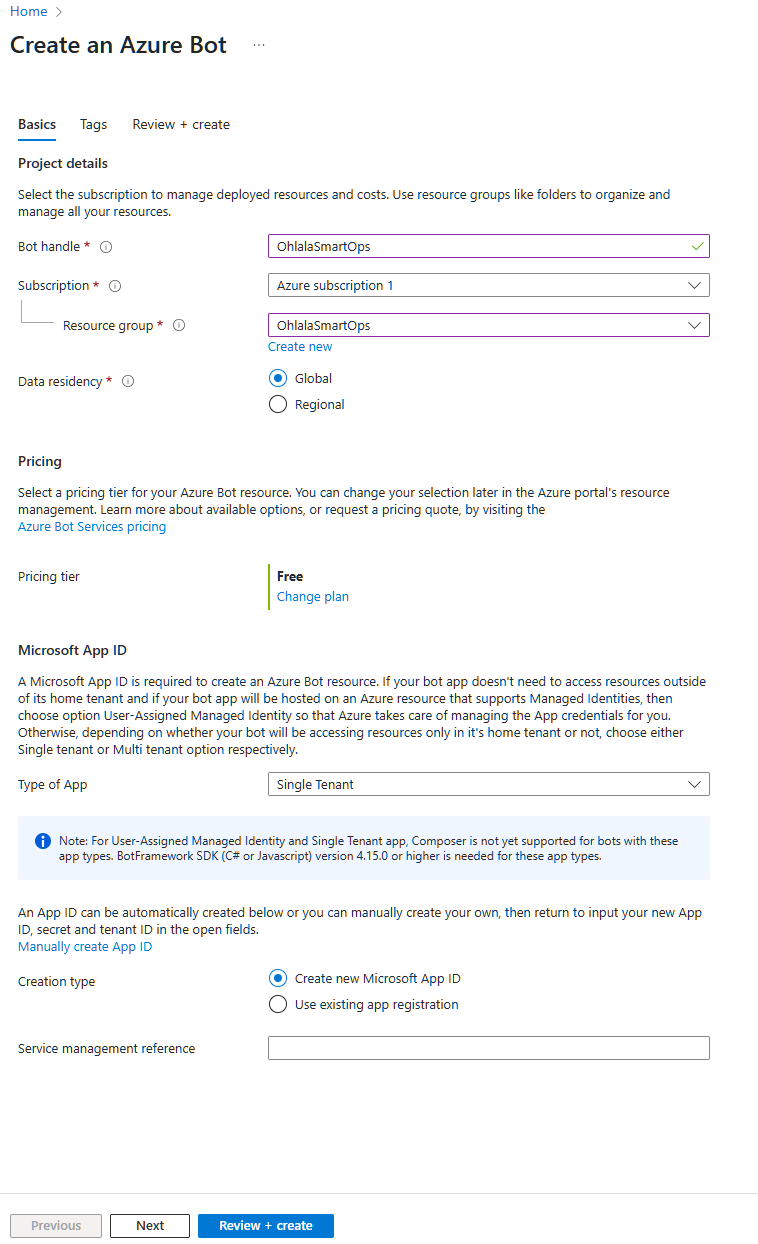
Click “Review + create” then “Create”. Deployment takes about 1-2 minutes.
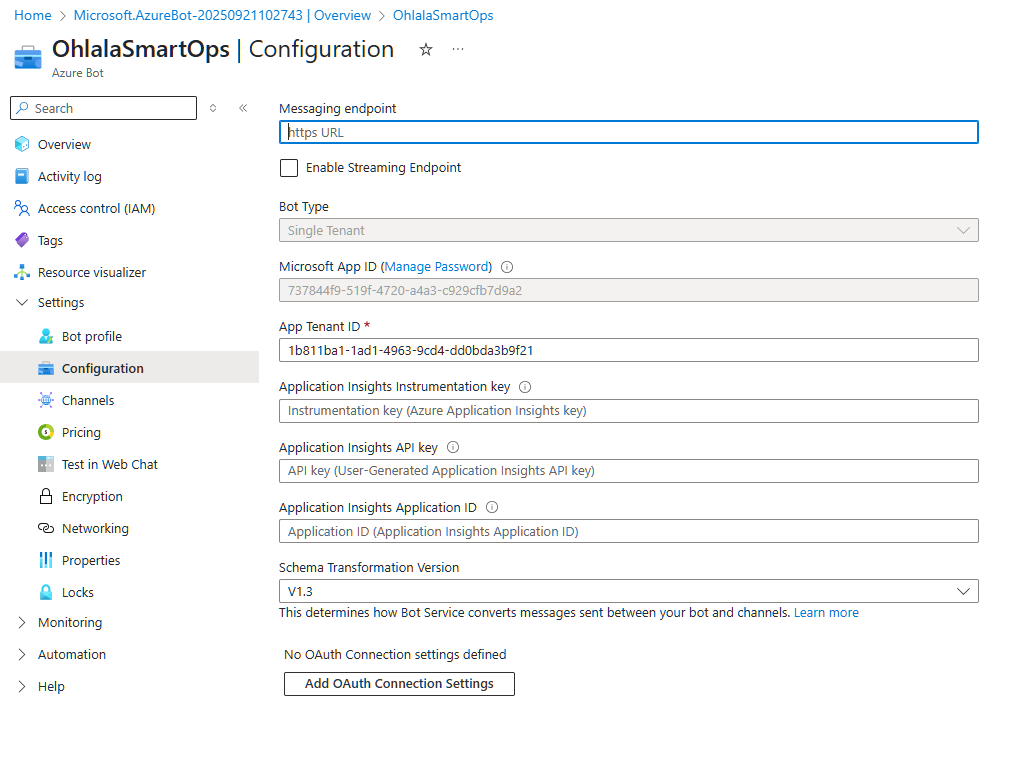
4. Get Authentication Credentials
After deployment completes, go to your bot resource.
Navigate to Configuration
- Go to Settings → Configuration
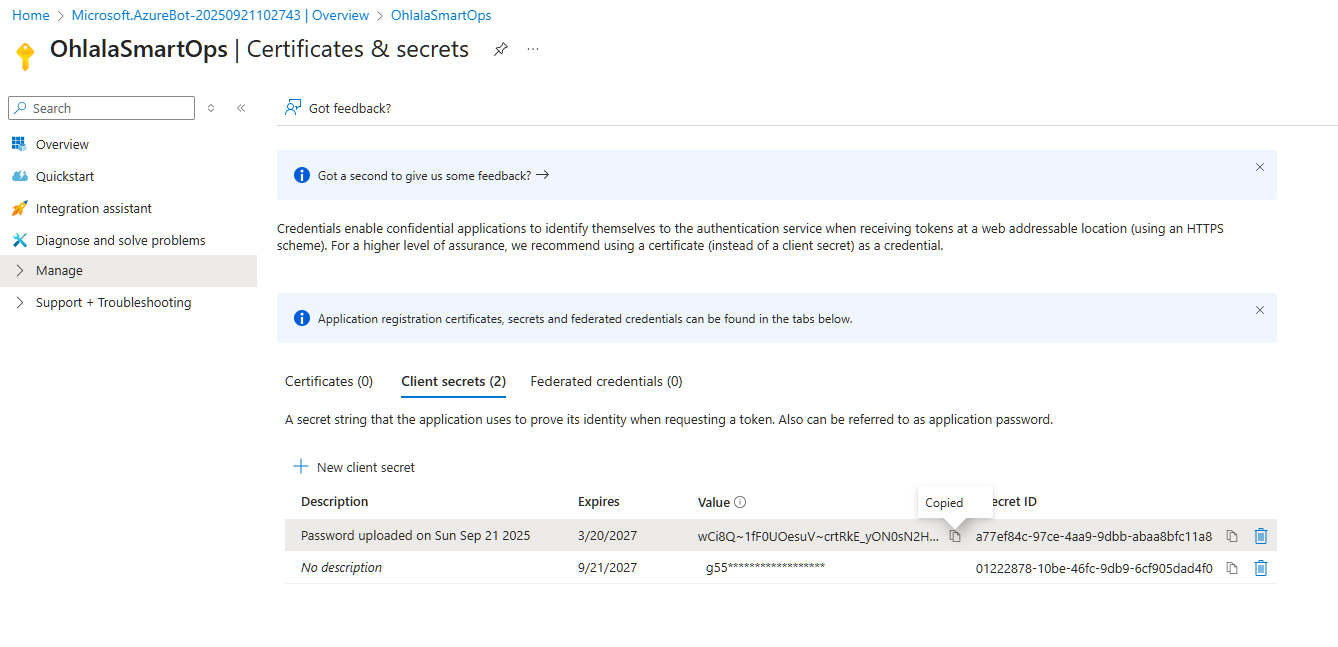
- You’ll see the Microsoft App ID - copy and save this
Create App Password
- Click “Manage Password” next to the App ID
- In the new window, click “New client secret”
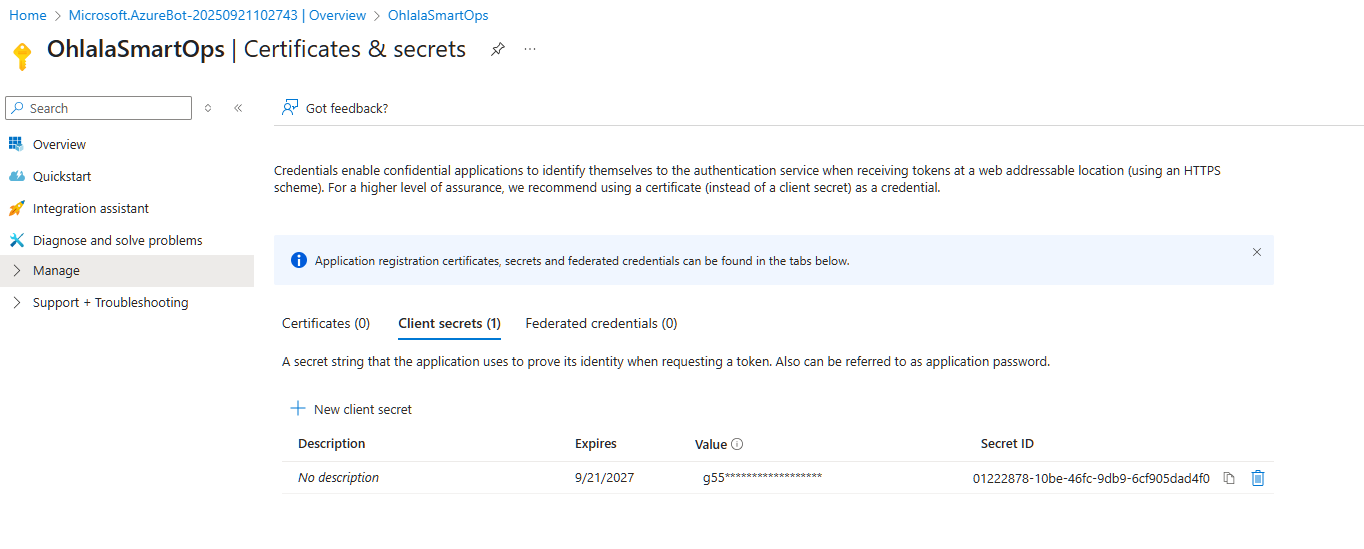
- Configure the secret:
- Description:
Ohlala SmartOps Bot Secret - Expires: Choose duration (recommend 24 months)
- Description:
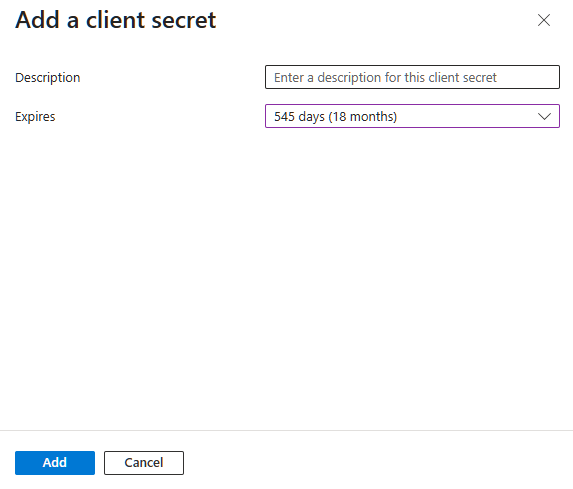
- Click “Add”
- IMPORTANT: Copy the secret value immediately!
Get Tenant ID
The Tenant ID is shown in the Azure Portal:
- Click on your account menu (top right)
- Select “Switch directory”
- Your Tenant ID is displayed there
Alternatively:
- Go to Azure Active Directory
- The Tenant ID is on the overview page
Save Your Credentials
You now have three critical values needed for deployment:
| Credential | Where to Find | Example |
|---|---|---|
| Microsoft App ID | Bot Configuration page | 12345678-1234-1234-1234-123456789012 |
| Microsoft App Password | Client secrets (copied) | AbC123... (long string) |
| Microsoft App Tenant ID | Azure AD or account menu | 87654321-4321-4321-4321-210987654321 |
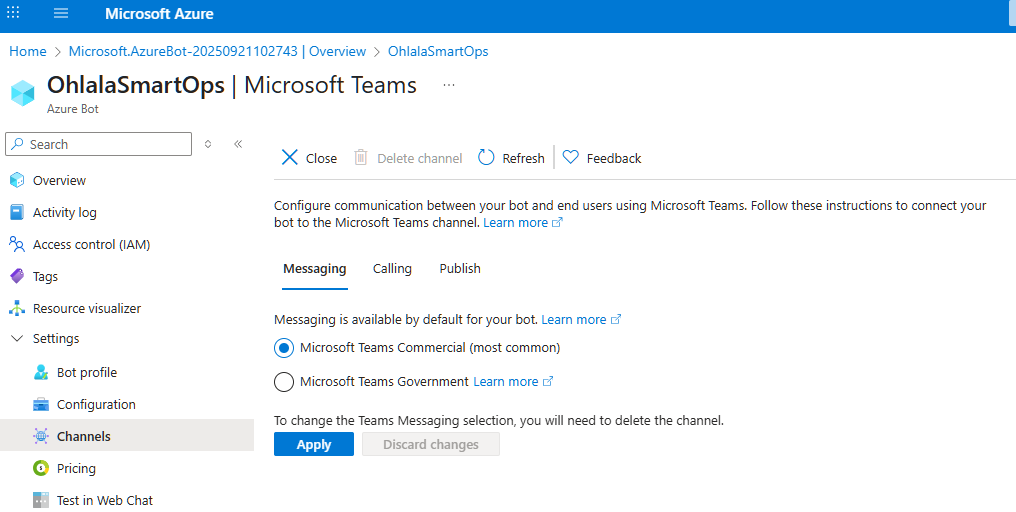
5. Configure Teams Channel
1. Open Channels Page
In your Azure Bot resource, navigate to Channels in the left sidebar.
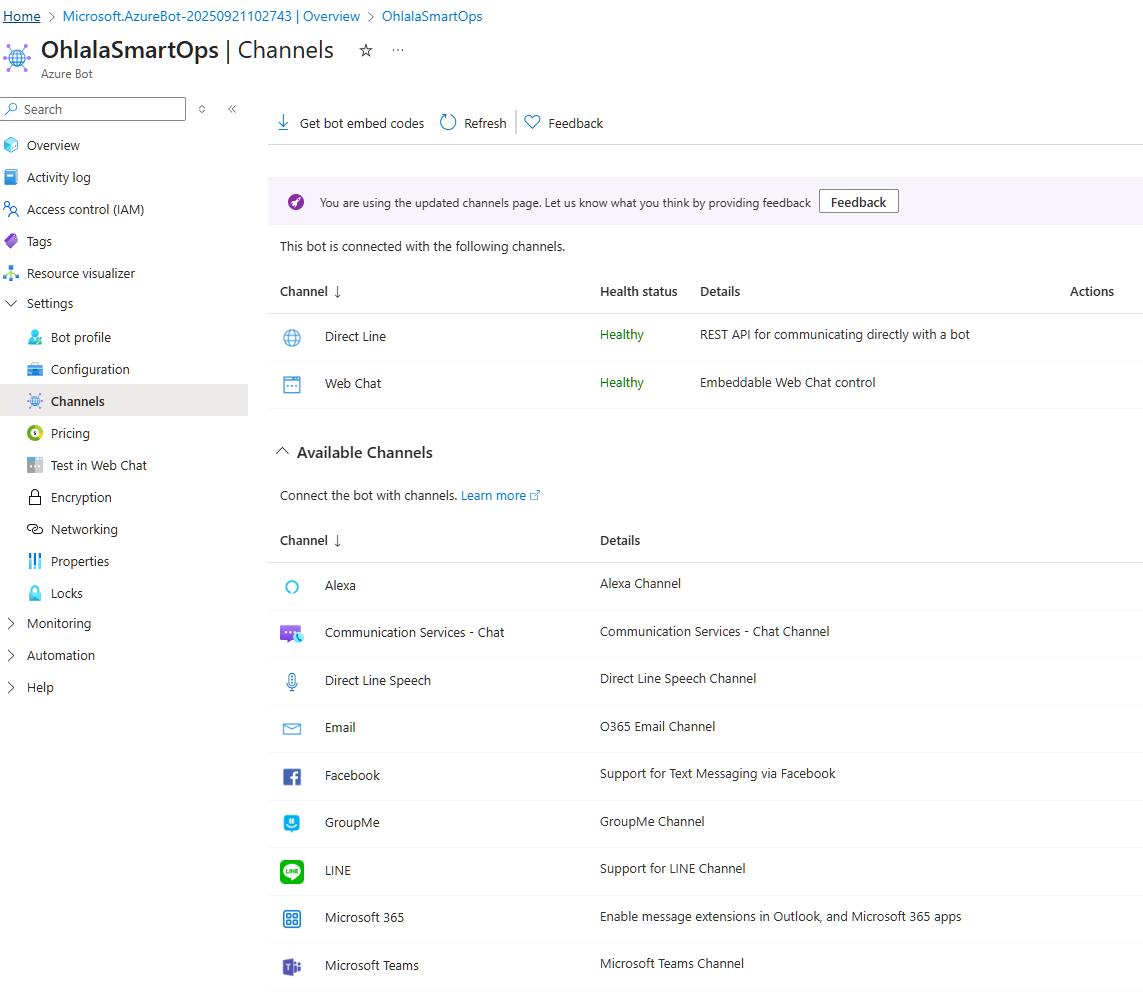
2. Add Microsoft Teams Channel
- Click on the Microsoft Teams icon
- Accept the terms and click “Agree”
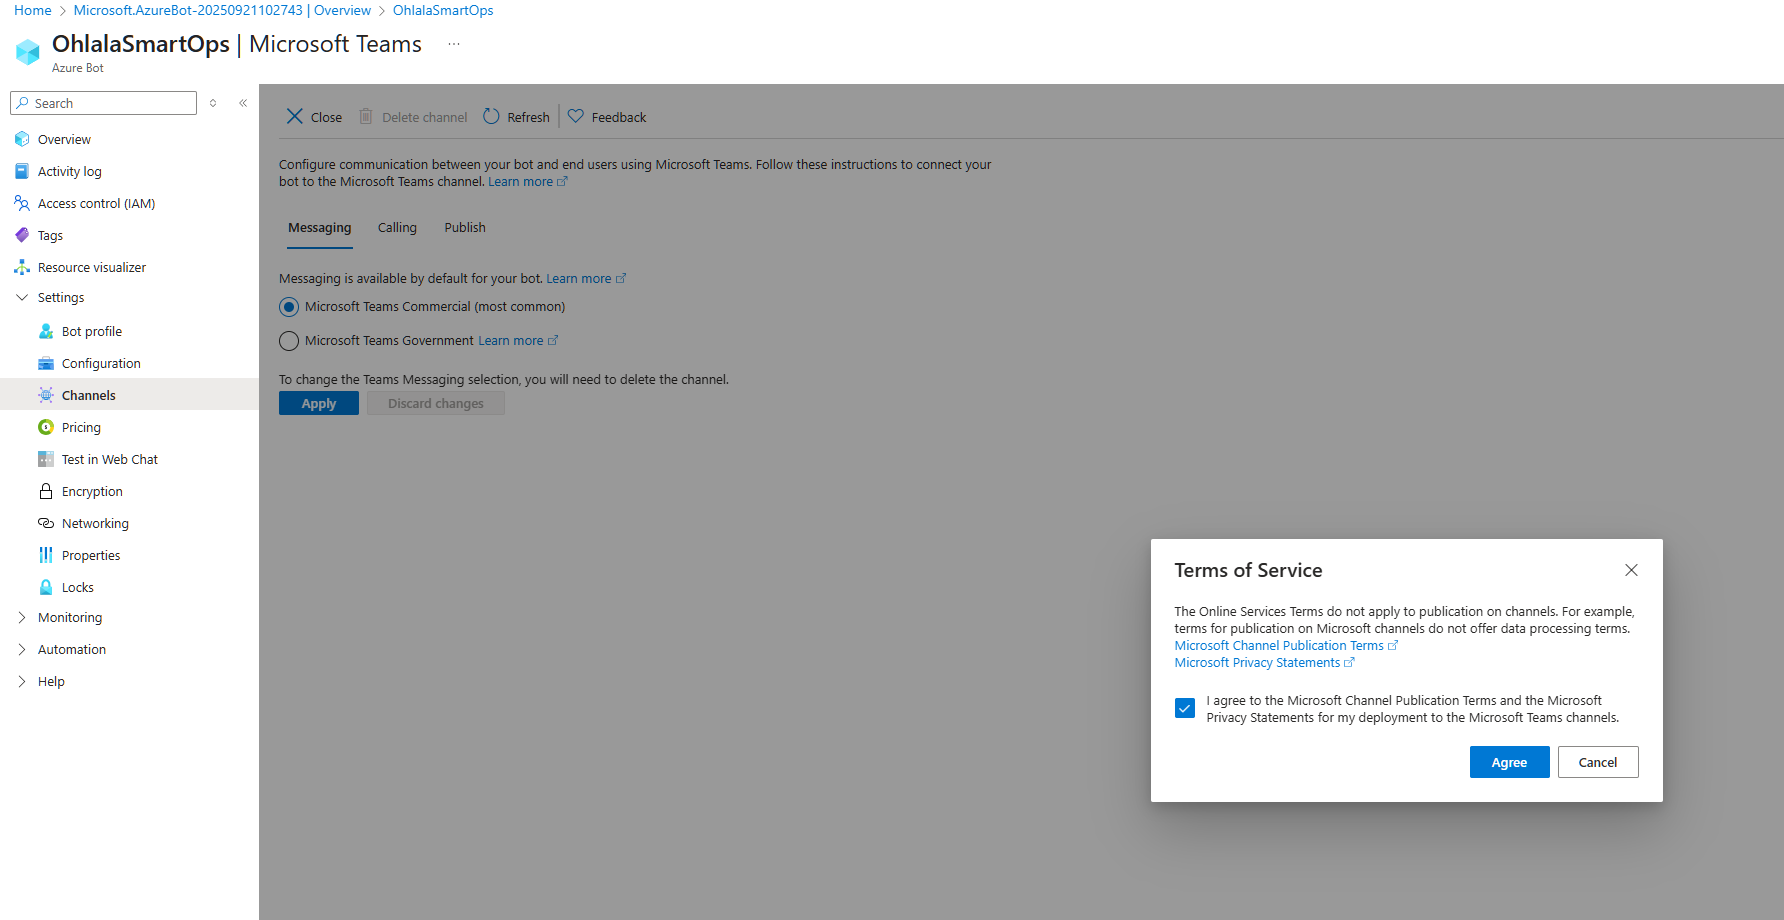
- Click on Apply
Common Issues
Issue: Free Tier Not Available
Solution: F0 tier is limited to one per subscription. Use S1 (Standard) tier instead (~$0.50/month).
Issue: Can’t Create App Password
Solution: You need appropriate permissions in Azure AD. Contact your Azure administrator.
Issue: Lost App Password
Solution: You can create a new client secret:
- Go to Bot Configuration → Manage Password
- Create a new client secret
- Update your deployment with the new password
Next Step
With your Azure Bot configured and credentials saved:
Continue to CloudFormation Deployment →